
Press-on nails have become a go-to solution for achieving salon-quality manicures at home. They’re affordable, versatile, and offer instant gratification—but what happens when it’s time to take them off? Improper removal can damage your natural nails and sabotage your next manicure. The good news: removing press-on nails safely is completely achievable when you know the right techniques.
In this comprehensive guide, you’ll discover multiple proven methods for how to remove press-on nails without damaging your natural nails. Whether you used glue or adhesive tabs, we’ll cover the safest removal techniques that protect your nail health and might even allow you to reuse those gorgeous press-ons!
Why Proper Press-On Nail Removal is Crucial for Nail Health
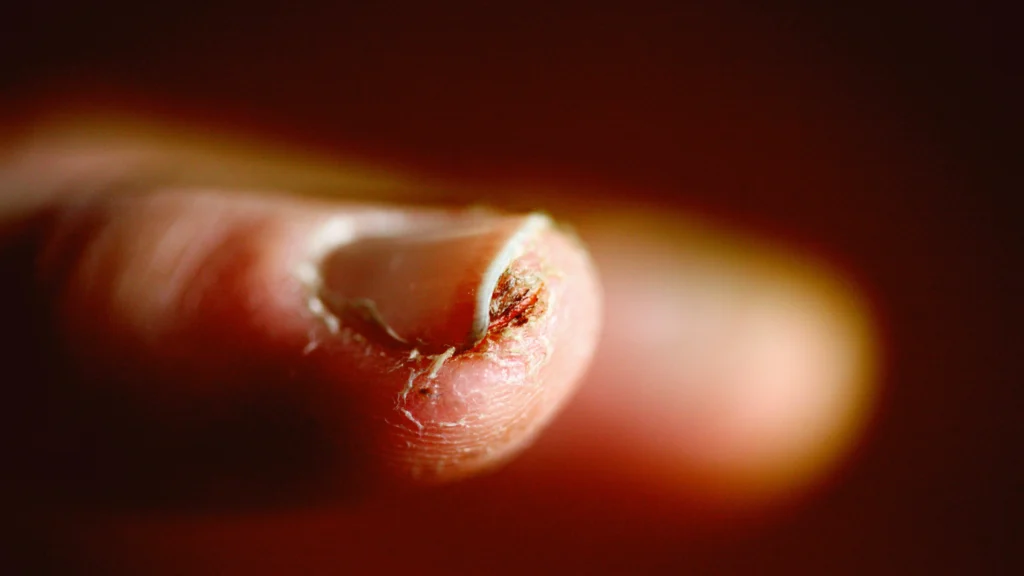
Taking shortcuts when removing press-on nails might save you a few minutes, but the damage can last much longer. Forcefully pulling off press-ons can:
- Tear away layers of your natural nail, causing thinning and weakness
- Create white spots and uneven texture on your nail plate
- Damage your nail bed, potentially causing pain and infection
- Lead to ridges and grooves that take months to grow out
By investing a little extra time in proper removal techniques, you’re protecting your natural nails and ensuring they stay healthy for future manicures. This is especially important if you regularly wear press-ons or alternate between different nail enhancement methods.
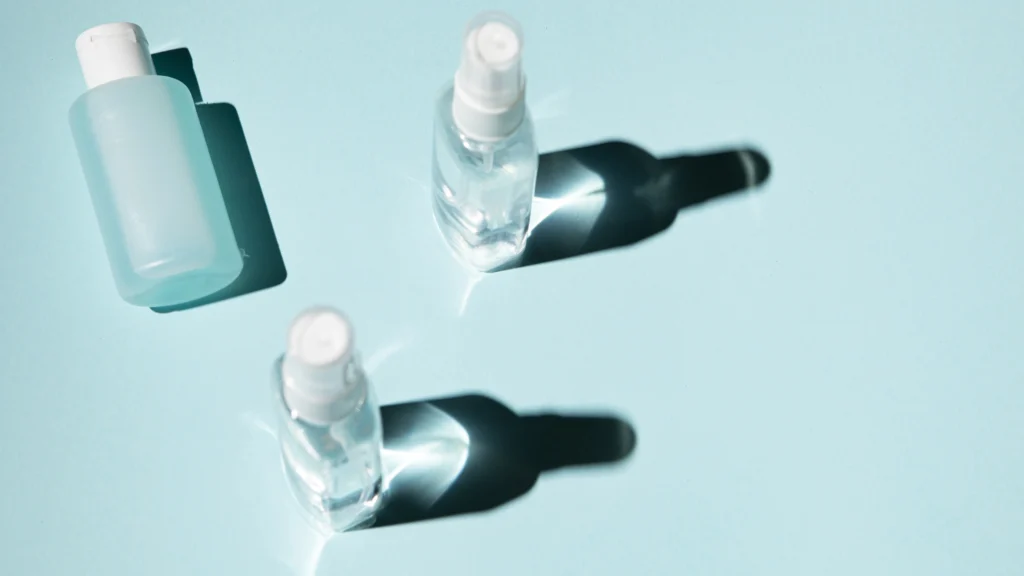
Key Supplies You Might Need (Gather Your Toolkit)
Different removal methods require different tools. Here’s a comprehensive list of what you might need based on your chosen technique:
For Acetone Method:
- Pure acetone (100%) or acetone-based nail polish remover
- Cotton balls or pads
- Aluminum foil (cut into squares)
- Orange stick or wooden cuticle pusher
- Petroleum jelly or cuticle oil (for skin protection)
- Nail buffer
- Hand towel
For Oil Method:
- Cuticle oil (jojoba, vitamin E, or olive oil work well)
- Bowl for soaking
- Warm water
- Gentle soap
- Orange stick or wooden cuticle pusher
- Hand towel
For Water Method:
- Bowl for soaking
- Warm water
- Gentle soap
- Orange stick or wooden cuticle pusher
- Hand towel
For Aftercare:
- Cuticle oil
- Hand moisturizer
- Nail strengthener (optional)
- Nail buffer (fine grit)
- Rubbing alcohol (for cleaning press-ons if reusing)
Having these supplies ready before you start will make the removal process smoother and more efficient.
How to Remove Press-On Nails Applied with GLUE
Method 1: The Acetone Soak (Fastest for Glue, Use Carefully)
Pros & Cons:
Pros:
- Fastest removal method for strong nail glue
- Highly effective for stubborn adhesives
- Works on almost all glue types
Cons:
- Drying to nails and surrounding skin
- Harsh chemical fumes
- Usually damages the press-on nails (not ideal for reuse)
- Can cause weakness if used frequently
Step-by-Step:
- Trim/File Length (Optional) If your press-ons are particularly long, consider carefully trimming or filing them shorter. This reduces the surface area and allows the acetone to penetrate more effectively.
- Protect Your Skin Apply petroleum jelly or cuticle oil around your cuticles and the skin surrounding your nails. This creates a protective barrier that prevents the acetone from drying out your skin.
- Prepare the Acetone Soak a cotton ball thoroughly in acetone for each nail. Ensure it’s wet enough to completely cover the press-on nail.
- Apply and Wrap Place the soaked cotton ball on top of each press-on nail, then wrap each fingertip with a small piece of aluminum foil. The foil helps keep the cotton in place and prevents the acetone from evaporating too quickly.
- Wait Patiently Allow your nails to soak for 10-20 minutes. The timing varies depending on the strength of the glue used—check one nail after 10 minutes by gently pressing to see if it feels loose.
- Gentle Removal Remove the foil from one finger at a time. Using an orange stick or wooden cuticle pusher, gently slide under the edge of the press-on nail to loosen it. The nail should lift off with minimal resistance. If it doesn’t, re-wrap and soak for an additional 5-10 minutes.
- Buff Away Residue Use a fine buffer to gently remove any remaining glue residue on your natural nail. Be careful not to over-buff, as this can thin your natural nail.
- Thoroughly Wash Wash your hands with soap and warm water to remove all traces of acetone. Follow immediately with nail aftercare.
Method 2: The Oil Soak (Gentler, Preserves Press-On, Slower)
Pros & Cons:
Pros:
- Gentle and nourishing for natural nails
- Moisturizes surrounding skin and cuticles
- Allows press-on nails to be reused
- No harsh chemicals or fumes
Cons:
- Takes longer than acetone (often 20-40 minutes)
- May not work effectively on very strong nail glue
- Requires patience and multiple applications
Step-by-Step:
- Apply Cuticle Oil Generously apply cuticle oil around the edges of each press-on nail. Try to work some oil under the edges of the press-ons if possible.
- Prepare the Soaking Solution Fill a bowl with warm (not hot) water. Add a few drops of gentle soap and a generous amount of oil—approximately 1-2 tablespoons of olive oil, jojoba oil, or vitamin E oil.
- Soak Your Fingertips Submerge your fingertips in the warm oil-water mixture for 15-20 minutes. The heat and oil will gradually break down the adhesive bond.

- Gently Test and Loosen After soaking, use an orange stick to gently test the edges of one press-on nail. If it starts to lift, carefully work the orange stick under the nail, applying more oil as needed. Never force or pull—if resistance is felt, more soaking is needed.
- Re-soak as Necessary If the nails aren’t loosening easily, return to soaking for another 10-15 minutes. Add more warm water if the solution has cooled.
- Remove and Clean Once the press-ons have loosened, gently remove them by continuing to work the orange stick under them until they lift off completely. Clean any remaining oil from both your natural nails and the press-ons (if planning to reuse them).
Method 3: Warm Water & Soap Soak (Least Effective for Glue, Safest)
This method is similar to the oil soak but may be less effective for strong nail glue adhesives. However, it’s the gentlest approach and worth trying first, especially if your press-ons have been worn for several days and the bond has already weakened naturally.
Step-by-Step:
- Fill a bowl with warm water and add a generous amount of gentle soap.
- Soak your fingertips for 20-30 minutes.
- Periodically test the edges of the press-ons with an orange stick to see if they’re loosening.
- If they begin to lift, gently work the orange stick under the nail until it comes off completely.
- If they resist after 30 minutes, consider switching to the oil soak method.
This method is particularly effective for press-ons that have been worn for 5+ days, as the adhesive has likely already begun to weaken.
How to Remove Press-On Nails Applied with ADHESIVE TABS
Adhesive tabs are generally much easier to remove than glue, which is one reason many people prefer them for regular press-on nail wear.
Primary Method: Warm Soapy Water & Oil
Step-by-Step:
- Oil Application Apply cuticle oil around and under the edges of each press-on nail.
- Prepare Soaking Solution Fill a bowl with warm water and add a few drops of gentle soap and a teaspoon of oil.
- Brief Soak Soak your fingertips for 5-10 minutes—adhesive tabs typically require less soaking time than glue.
- Gentle Removal Using an orange stick, gently lift from one side of the nail. The press-on should begin to release as the adhesive tab softens. Work slowly around the edges until the nail lifts off completely.
- Remove Residual Adhesive Peel any remaining adhesive tab from your natural nail. If residue remains, a small amount of oil on your fingertip can help roll it away.
This method is generally sufficient for removing press-ons applied with adhesive tabs. The nails and tabs should come off intact and with minimal effort compared to glue removal.
Using Official Press-On Nail Removers (e.g., Olive & June)
Many press-on nail brands now offer their own removal solutions specifically formulated for their products. These removers typically contain:
- Solvents similar to acetone but potentially less harsh
- Oils and moisturizing ingredients to counteract drying
- Specific ingredients designed to target their particular adhesive formula
When using a brand-specific remover:
- Read and follow the manufacturer’s instructions precisely
- Still take care to protect your skin and cuticles
- Be patient and allow the product to work as directed
- Use the proper tools (often included in removal kits)
While these products can be effective, the general methods outlined above (especially the oil soak) remain the safest way to remove press-on nails without damaging your natural nails.
How to Clean and Prep Press-On Nails for REUSE
One of the best features of press-on nails is their potential for reuse, making them even more economical. Here’s how to properly save your press-ons for another wear:
Step 1: Remove Adhesive Residue
Using a fine buffer, gently buff away any remaining glue or adhesive residue from the back of the press-on nail. Focus only on the inside surface that attaches to your natural nail. Work slowly to avoid damaging the nail’s shape or design.
Step 2: Clean Thoroughly
Wipe each press-on nail with rubbing alcohol on a cotton pad. This removes oils and ensures the surface is clean for future application.
Step 3: Proper Storage
Store your cleaned press-ons in their original packaging if available. Alternatively, use a small plastic bag or container specifically for nail storage. Label the set if you have multiple styles.
Important Note:
Press-ons removed using the acetone method are less likely to be reusable, as acetone can damage the material and affect the nail’s appearance. The oil or water methods are strongly preferred if you plan to reuse your press-ons.
Essential Aftercare for Your Natural Nails
Proper aftercare is crucial regardless of which removal method you choose. Follow these steps to ensure your natural nails recover quickly:
- Thorough Cleansing Wash your hands with gentle soap to remove any remaining acetone, oil, or adhesive residue.
- Gentle Buffing (If Needed) If your nails have slight residue or roughness, use a very fine buffer to smooth the surface. Use minimal pressure and buff in one direction to avoid weakening the nail.
- Cuticle Oil Application Apply cuticle oil generously to your entire nail plate, cuticle, and surrounding skin. Massage it in to stimulate blood flow and encourage healing.
- Deep Hydration Follow with a rich hand cream to restore moisture after the removal process. Pay special attention to your fingertips and cuticles.
- Nail Strengthener (Optional) If your nails feel weak or damaged, apply a nail strengthener or hardener containing keratin or calcium.
- Recovery Period Consider giving your nails a break between press-on applications. Even 2-3 days allows your natural nails to breathe and recover.
Common Mistakes to Avoid During Removal
Even with the best intentions, these common removal mistakes can damage your natural nails:
- Forcing or Ripping Off Press-Ons: Never pull, peel, or force press-on nails off. This tears layers of your natural nail and causes lasting damage.
- Skipping Skin Protection: When using acetone, failing to protect your skin leads to extreme dryness and irritation.
- Insufficient Soaking Time: Getting impatient and cutting the soaking time short makes removal harder and increases the risk of damage.
- Using Sharp Metal Tools: Metal tools can slip and damage your nail bed. Stick to wooden orange sticks or specifically designed plastic nail tools.
- Over-Filing Natural Nails: Aggressive buffing to remove glue residue can thin your natural nails. Use minimal pressure and fine grit buffers only.
- Neglecting Aftercare: Skipping moisturizing and cuticle oil after removal leaves nails vulnerable to brittleness and breakage.
Frequently Asked Questions
How long does it take to remove press-on nails?
Removal time varies by method and adhesive strength. Acetone removal typically takes 15-30 minutes, while oil or water methods may take 20-40+ minutes. The key is patience—rushing increases the risk of damage.
Can I use non-acetone nail polish remover?
Non-acetone removers are generally ineffective against nail glue but might work slowly on adhesive tabs. For glued press-ons, pure acetone or the oil soak method will be more effective.
What’s the difference between removing glue vs. adhesive tabs?
Glue creates a stronger bond requiring solvents (acetone) or longer oil/water soaks to dissolve. Adhesive tabs create a mechanical rather than chemical bond, making them much easier to loosen with gentle soaking and manipulation.
Help! My press-on nails won’t come off!
If you’re struggling with removal:
- Ensure you’re soaking long enough (20+ minutes minimum for stubborn glue)
- Check that you’re using 100% acetone, not diluted nail polish remover
- Try warming your soaking solution slightly to increase effectiveness
- Add more oil to the soaking solution if using the oil method
- Never force removal—re-soak and try again
How often should I give my nails a break from press-ons?
Most nail professionals recommend giving your nails a 1-2 week break every month or two. If you notice any signs of damage (peeling, white spots, ridges), take a longer break and focus on nail repair treatments.
Expert Tip Showcase
“The biggest mistake I see clients make is trying to rush the removal process. Press-on nails aren’t like regular polish—they need time to properly dissolve or loosen. I always recommend the oil soak method to my clients who wear press-ons regularly. It’s gentler on the natural nail and preserves the press-ons for reuse, which is more economical and eco-friendly. Patience really is the key to damage-free removal.”
— Melissa Chen, Licensed Nail Technician with 15+ years of experience
Concluding Summary
Removing press-on nails safely is all about patience and using the right technique for your specific situation. The oil soak method stands out as the safest way to remove press-on nails while preserving both your natural nails and the press-ons themselves for future use.
Remember these key takeaways for successful press-on nail removal:
- Choose your removal method based on the adhesive used and whether you want to reuse the nails
- Gather all supplies before starting to make the process smoother
- Never force or peel off press-on nails
- Be patient and give the removal solution adequate time to work
- Always follow with proper nail aftercare
With these techniques and tips, you can enjoy the versatility and convenience of press-on nails while keeping your natural nails healthy and strong underneath. Happy nail care!
