Your feet work hard every day—they deserve some love and attention! Whether you’re prepping for sandal season or just want to treat yourself to a little self-care, an at-home pedicure is the perfect way to relax and rejuvenate. In this step-by-step tutorial, we’ll guide you through everything you need to know to achieve soft, smooth, and polished feet. Let’s get started!
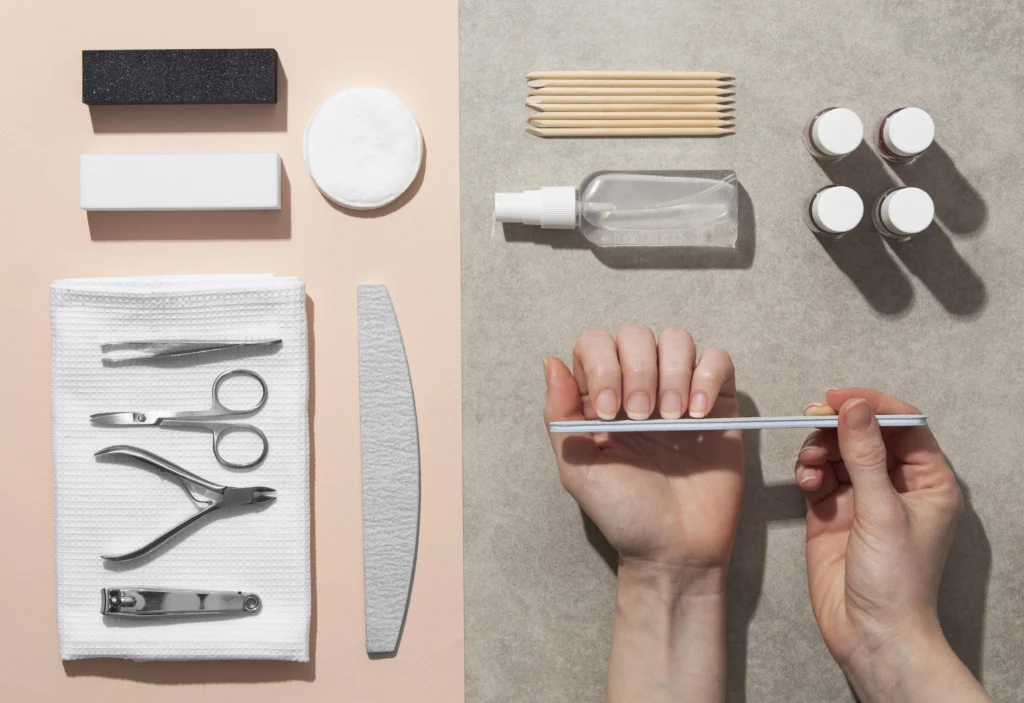
What You’ll Need:
Before we begin, gather these essentials:
- Nail polish (your favorite shade!)
- Base coat and top coat
- Nail polish remover
- Cotton pads or balls
- Nail clippers and file
- Foot soak (or Epsom salts)
- Pumice stone or foot scrub
- Cuticle pusher or orange stick
- Moisturizer or foot cream
- Towel
- Toe separators (optional)
Step 1: Remove Old Polish
Start with a clean slate!
- Use a cotton pad soaked in nail polish remover to wipe away any old polish from your toenails.
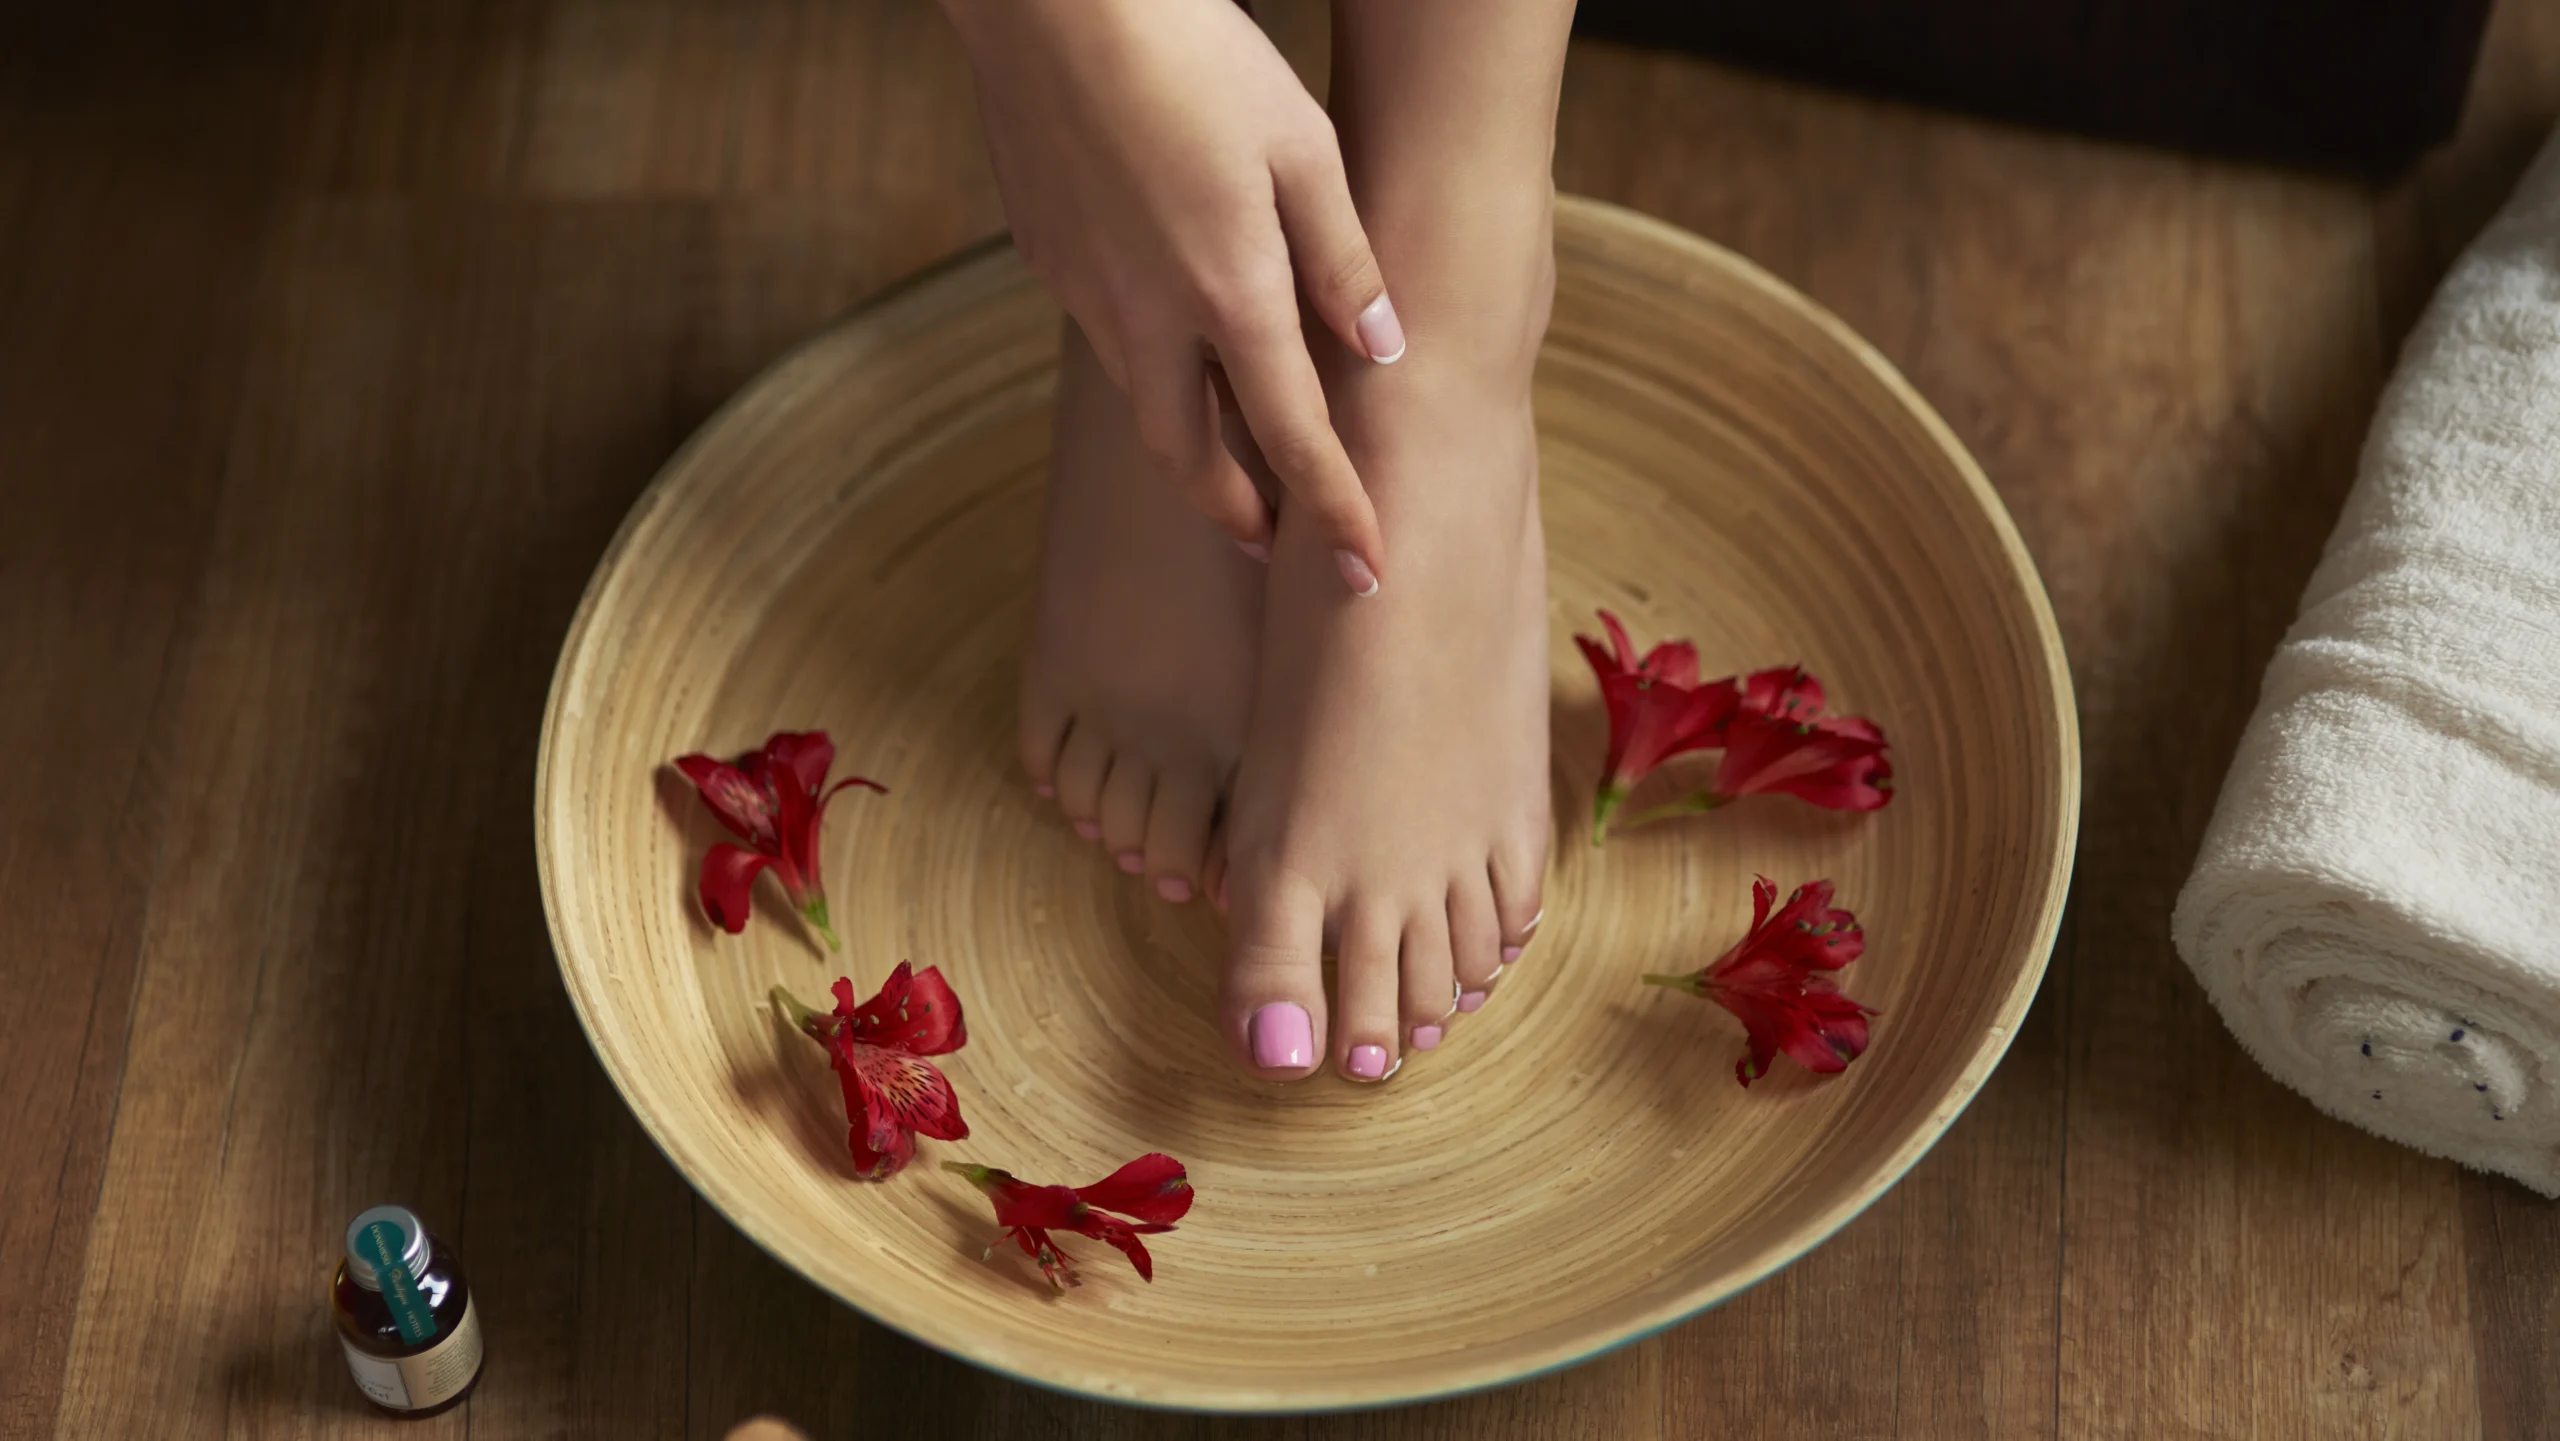
Step 2: Soak Your Feet
Time to relax and soften your skin.
- Fill a basin with warm water and add a handful of Epsom salts or your favorite foot soak.
- Soak your feet for 10-15 minutes to soften calluses and cuticles.
- Dry your feet thoroughly with a towel.
Step 3: Trim and Shape Your Toenails
Now it’s time to tidy up your nails.
- Use nail clippers to trim your toenails straight across (avoid rounding the edges to prevent ingrown nails).
- Use a nail file to smooth the edges and shape your nails.
Step 4: Exfoliate Your Feet
Say goodbye to rough, dry skin!
- Use a pumice stone or foot scrub to gently exfoliate your heels and the balls of your feet. Focus on areas with calluses or dry patches.
- Rinse your feet and pat them dry.
Step 5: Push Back Cuticles
Keep your cuticles neat and tidy.
- Use a cuticle pusher or orange stick to gently push back your cuticles. Avoid cutting them, as this can lead to infections.
Step 6: Moisturize Your Feet
Hydrate and nourish your skin.
- Apply a thick layer of foot cream or moisturizer to your feet, focusing on dry areas.
- Massage your feet for a few minutes to improve circulation and relaxation.
Step 7: Apply Nail Polish
Now for the fun part—adding color!
- Apply a Base Coat: Start with a thin layer of base coat to protect your nails and help the polish adhere better. Let it dry for 1-2 minutes.
- Apply Your Polish: Use the 3-stroke method (center, left, right) to apply your chosen nail polish. Start with thin layers and let each coat dry for 2-3 minutes before applying the next.
- Seal with a Top Coat: Finish with a layer of top coat to add shine and prevent chipping. Don’t forget to seal the tips of your nails!
Pro Tip: Use toe separators or rolled-up tissue paper to keep your toes apart and avoid smudges.
Step 8: Let It Dry Completely
Patience is key!
- Allow your polish to dry completely (at least 15-20 minutes) before putting on socks or shoes.
- For extra protection, use a quick-dry spray or drops.
Bonus Tips for a Perfect Pedicure:
- Set the Mood: Light a candle, play relaxing music, and create a spa-like atmosphere at home.
- Stay Consistent: Give yourself a pedicure every 2-3 weeks to maintain soft, polished feet.
- Experiment with Colors: Try bold shades, glitter, or nail art to express your style.
- Hydrate Daily: Keep your feet soft by applying moisturizer daily, especially after showering.
